How to integrate Zapier with your website
Stop copy-pasting data between your website and your tools. A step-by-step walkthrough, plus how it works on WordPress, Wix, Squarespace, Shopify, Webflow, and custom sites.
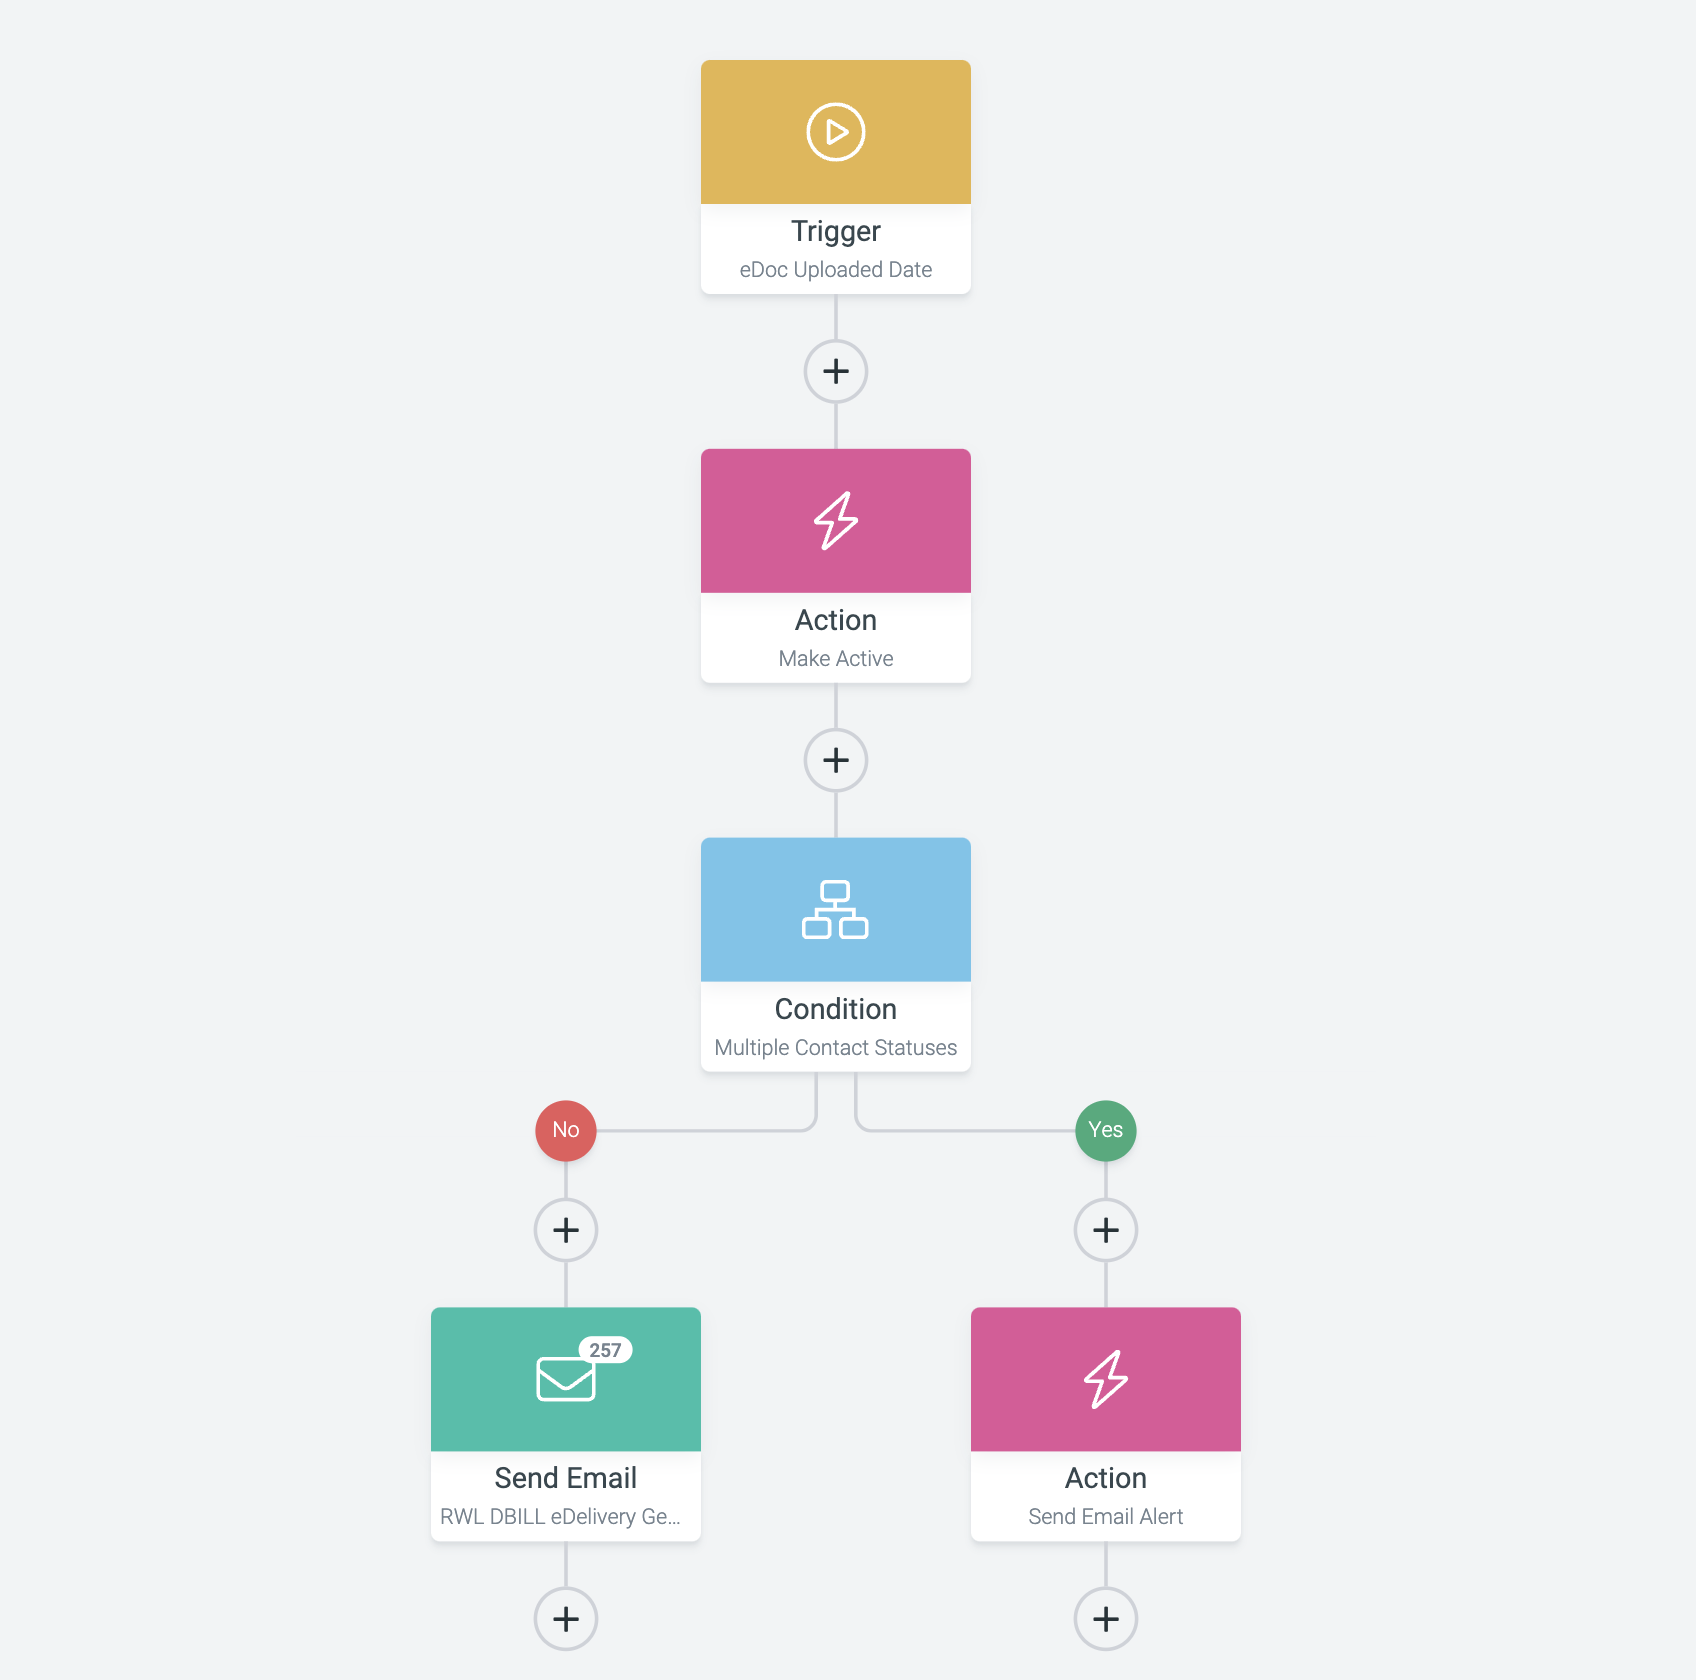
Your website probably does one thing well: it collects information. Someone fills out your contact form, books a call, or signs up for your email list — and then what? If your answer is "I type it into another system by hand," you're losing hours a week to work a machine should do.
Zapier is the bridge. It connects your website to 9,000+ apps (as of 2026), including Google Sheets, your CRM, email, Slack, and calendars. When something happens on your site, everything downstream updates automatically. You build it all with dropdowns and clicks.
In this guide we'll walk through exactly how to integrate Zapier with your website, step by step, and show you how it works on the most common website platforms.
What Zapier actually does
Zapier moves data between apps using Zaps, automated workflows with two parts:
- A trigger: something that happens ("Someone submits my contact form")
- An action: what happens next ("Add them to my CRM and send me a Slack message")
You pick both, connect the apps, and Zapier handles the rest. One Zap can also chain multiple actions or steps (called multi-step Zaps), so one form submission can add a lead to your CRM, create a row in a spreadsheet, and send a thank-you email. Multi-step Zaps require a paid plan; the free plan is one trigger and one action only.
Popular website integrations people build with Zapier
- Contact form → Google Sheets (instant lead log)
- Contact form → CRM (HubSpot, Salesforce, Pipedrive, or a simple tool like Streak)
- New email subscriber → Mailchimp / MailerLite (automatic list management)
- New WooCommerce order → Slack message + invoice email
- Calendly or TidyCal booking → CRM entry + reminder email
- New YouTube/Instagram post → auto-publish to your site's blog or feed
Before you start
You'll need three things:
- A Zapier account: free tier includes 100 tasks/month, which is enough for most small businesses starting out
- The app you want to connect: e.g., WordPress, Wix, Squarespace, Google Sheets, or your CRM
- The login to that app: Zapier will ask you to connect it securely (most connections use OAuth, so Zapier never sees your password)
The 7-step walkthrough: connect a form to Google Sheets
The classic starter Zap. When someone submits your website's contact form, Zapier adds a row to a Google Sheet. Here's how:

- Log in to Zapier and click Create Zap.
- Pick your trigger app. Search for your form or website platform (WordPress, Wix, Squarespace, Typeform, Google Forms, etc.). If your platform has a Zapier app, pick it. If not, use Webhooks by Zapier (we'll cover that below).
- Pick your trigger event. For most form apps, it's "New Submission" or "New Entry."
- Connect your account. Click "Sign in" and approve the connection. Zapier will ask you to run a test so it can pull a sample of the data.
- Pick your action app. Choose Google Sheets, then the event Create Spreadsheet Row.
- Map the fields. This is the only slightly fiddly step: match the form fields (Name, Email, Message) to the columns in your sheet. It's a dropdown-to-dropdown match.
- Test and turn it on. Click Test action (Zapier adds a test row), check the sheet, then name your Zap and flip the switch. Done.
That's the whole pattern. Swap Google Sheets for your CRM, Slack, or email and the steps are identical. The only difference is which app you pick in steps 2 and 5.
Using webhooks: Zapier for custom or unusual sites
Not every website has a Zapier app. Custom-built sites, static sites, and older CMSs often don't. That's where webhooks come in. They're the universal connector.
A webhook is just a URL that your website sends data to whenever something happens. Zapier gives you a Catch Hook trigger URL; your site posts the form data to that URL; Zapier captures it and runs your actions.
There are two easy ways to send data to a webhook URL without writing code:
- A form-to-webhook service: tools like Formspree, Getform, or Basin give your form a URL and forward submissions to your webhook
- A form plugin with webhook support: most modern form plugins (Gravity Forms, WPForms, Elementor Forms, and so on) have a "webhook" or "Zapier" integration built in
This is also how custom-built sites hook into Zapier. It's a 5-minute job for anyone comfortable with a form handler. If that sounds like you, great; if not, this is exactly the kind of thing we build for small businesses (more on that at the end).
How Zapier integration works on each major platform
- WordPress: the most flexible option. Form plugins like WPForms, Gravity Forms, Fluent Forms, and Elementor Forms all have native Zapier integrations (or webhook options), so you don't touch any code. WooCommerce, LearnDash, and most other popular plugins are Zapier-ready too. For deeper connections, the WP Webhooks plugin can trigger Zaps from almost any WordPress event.
- Wix: Wix Forms has a built-in Zapier app: connect it as the trigger, pick "New Submission," and map your fields. Wix Bookings and Wix Stores also have Zapier connections for appointments and orders.
- Squarespace: Squarespace's native forms don't have a direct Zapier app, but the standard workaround is solid: connect your form to Google Sheets or a service like Formspree (or use a third-party form like Typeform embedded on the page), then let Zapier take it from there.
- Shopify: one of the best-supported platforms. New orders, customers, and products can trigger Zaps into Slack, QuickBooks, email, or your CRM. The Shopify app on Zapier handles most of it with pre-built templates.
- Webflow: Webflow's native form submissions can be sent to a Zapier Catch Hook webhook directly from the form settings panel. Site CMS content changes can also trigger Zaps.
- Custom / static / hand-coded sites: use the webhook route above, or have your developer post form data to your Zapier webhook URL. Once it's set up, it behaves identically to a native integration.
- Email platforms (Mailchimp, MailerLite, ConvertKit): all have Zapier apps. Trigger on a new subscriber and sync to your CRM, Sheets, or a welcome automation.
Frequently asked questions
Does Zapier cost money?
The free plan includes 100 tasks/month, enough to test and run a couple of light Zaps. Paid plans (roughly $20–$30/month for small-business tiers, and they change) start around 750 tasks/month with multi-step Zaps. For most small sites, the free tier or the entry paid plan is plenty.
Do I need to know how to code?
No. The whole point of Zapier is connecting apps through dropdowns. The only "technical" moment is field mapping, and it's self-explanatory once you do it once.
Can Zapier integrate with my WordPress site?
Yes. It's the platform with the most options (form plugins, WooCommerce, WP Webhooks, or direct REST API connections).
What's the difference between Zapier and webhooks?
Zapier is the app that connects things without code. A webhook is a technical method of sending data between systems. Zapier uses webhooks internally, and exposes them to you. Webhooks are one of Zapier's tools.
What if my app isn't in Zapier's list?
Zapier has 9,000+ apps, but if yours isn't there, you can often still use Webhooks by Zapier (if the app can send or receive webhooks) or a service like Make or n8n. If none of those work, a small custom script is the fallback.
Is it safe to connect my website's data to Zapier?
Most connections use OAuth, so Zapier never stores your app passwords. You can revoke access any time, and paid plans add options like SSO and data retention controls. Standard good practice applies: don't connect anything you wouldn't connect to a trusted third party.
Can I undo or pause a Zap?
Yes. Every Zap can be paused or deleted in one click, and Zap runs are logged so you can see exactly what happened and when.
When NOT to use Zapier
Honesty section, because it'll save you money: Zapier is not always the right tool.
- Very high volume — if you're moving thousands of records a day, a direct API integration will be cheaper and faster than task-based pricing
- Complex business logic — many branches, loops, or heavy data transformations get unwieldy in Zaps; a custom integration or a tool like n8n may serve you better
- Real-time or near-real-time needs — Zapier checks triggers on an interval (minutes, not milliseconds); if you need instant sync, webhooks or a direct integration win
- The app already connects directly — if your CRM has a native WordPress or Shopify plugin, use that first and keep Zapier for the long tail
If you're unsure which route fits your situation, that's a normal question to ask — a good integrator will tell you when you don't need Zapier, not just sell you one.
Bottom line
Integrating Zapier with your website is a 20-minute job for the common cases, and it pays for itself the first week by killing manual copy-paste forever. Start with one Zap (form → Google Sheets is the perfect first one), see how it feels, then expand into your CRM, email, and notifications.
The monthly cost nobody mentions
Here's the part of the Zapier story that usually gets left out: Zapier is another monthly subscription. It's a tool for connecting systems that weren't built to talk to each other — and it works — but the cost scales with your usage. The free tier runs out fast, and once you're on paid plans, every task, every Zap, every workflow is another line on the bill. A handful of Zaps that move real customer data can run you $20–$100+ a month, forever, and the price only goes up as your business grows.
That's the trap. The more you depend on Zapier, the more you pay, and the harder it is to leave. Meanwhile the actual problem — your website and your tools not talking to each other — is a one-time integration job, not a permanent rental.
We build the connections directly into your website and your systems. No middleman, no per-task pricing, no recurring Zapier bill. You get the same automation — forms to your CRM, orders to your team, leads to your inbox — without paying rent on the glue every month.
That's our edge over Zapier: we do everything their ecosystem can do, without the extra cost. Your website, your data, your automations, all in one system you own. It's why AI-powered systems win against point tools like Zapier — one system that does it all beats a stack of subscriptions every time.
If you're already paying for Zapier (or about to start), that's a cost worth questioning. Get a free website checkup and we'll show you exactly what you're paying for — and what you could own instead.
Related: automation & integrations and lead management.
Rather have it done right the first time?
We build websites and AI automation for small businesses in Adrian, Michigan, including Zapier integrations, webhooks, and AI agents that answer calls and texts.